Amtrak Cross Country Trip: First Time Train Trip Adventure
 Our grandchildren live in Ontario, Canada. We live in California. We have not been able to visit them since just before COVID. My wife and I thought about driving across the country because we have a motor home. Then, we decided to make an adventure out of the trip doing something we have never done. We decided to make a Amtrak cross country trip.

Scheduling an Amtrak Cross Country Trip
Although Amtrak has a website, it is difficult to navigate with all the options. So, I went to the station and asked the clerk to make our reservations for us. I was glad I did that. There were a lot of things I didn’t know about scheduling our trip.
Pricing for Amtrak
As departure time approaches, cruise lines reduce the price of rooms. They upgrade people if more expensive rooms are open in hopes of selling the less expensive rooms. Amtrak is just the opposite. The closer you book to your departure date the fewer seats may be available. As seats sell out, the remaining seats become expensive. Book your trip well in advance, if possible. Also, check with a ticket agent about departure days at both end of the trip. Some days are normally busier than others and are more expensive to begin with.
Booking Rooms for An Amtrak Cross Country Trip
There are a variety of rooms available on most Amtrak trains. Pricing is based on travel dates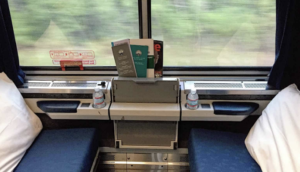 . The roomette is big enough for two people. There are two opposing seats, a fold down table and large window. An upper bunk drops down and the seats fold out for sleeping. There is no private bath. A bed room is bigger with a couch and chair and private bath. Of course, this is a more expensive room. Each train has a family size room and an accessible room.
My wife and I booked our roomette a few months in advance. I got the room instead of a coach seat. At the time, the roomette was not very much more expensive that the seat. My wife bought a seat, but, of course, shared the roomette with me. Amtrak then was able to sell her coach seat again. 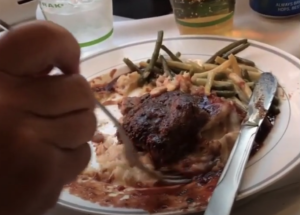
The roomette included all meals for both of us. The meals were amazing. There were a least 5 menu options at each meal. We had the choice of eating in the dining car or having meals served our roomette. We ate in the dining car.
One thing we did not think about was the location of our room. With two floors of rooms, upstairs is quieter. The center of the car is best away from stairs and bathroom. The station attendant also booked rooms so we could see the ocean coming home but could see the mountains heading east.
The Cosmopolitan Lounges
 One more important perk with any Amtrak room are the Cosmopolitan Lounges. At every major station there is a Cosmopolitan Lounge. When we waited to catch the train from Chicago to Detroit, when we waited in the Cosmopolitan Lounge. There are comfortable chairs, television and free or inexpensive food and drinks. When we headed north from Los Angeles on the trip home, we waited in the Cosmopolitan Lounge. Free redcap service with shuttles to help with bags and getting to the train is leaves from the Lounges.
Scheduling for an Amtrak Cross Country Trip
 Tight scheduling during a long train trip is not a good idea. We were 13 hours late getting to Chicago from just outside San Francisco. Because this was our first cross country train adventure, we didn’t care. But if we had tight connections along the way, it would have been upsetting.
Our train arrived late to begin our trip because track was washed out somewhere along the way. That delayed our departure by 4 hours. Halfway to Chicago we hit a car. Fortunately, no one was hurt but between the police, railroad inspectors and changing engines, we were delay another 5 hours. Other little delays here and there added up to 13 hours late.
When we travel by train again, we won’t schedule anything during the trip that can’t be cancelled or changed.
What to take on a Amtrak Cross Country Trip
Because we were visiting family for ten days on top of the train trip, we took a lot more stuff than we needed. Our thought for the future is to take one, carry-on bag each and a back pack. For the sleeping cars, there was a place to store bags so they are accessible. In the roomette, their was enough room two back packs, and a few other items.
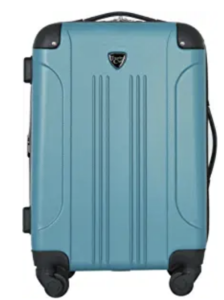 Carry-ons should be hard. With hauling them off and on the train onto station
 carts and up platform stairs, they take a lot of abuse. Good handles are essential. Spinner wheels make it easy to walk with the bag when walking through the station to a Cosmopolitan Lounge. Bag packs can be carried the traditional way or strapped to the carry-on handle.
Towels, soap, shampoo and linens are provided on the train. Personal items should be carried on. There is no place to buy items on the train.
Things to do on an Amtrak Cross Country Trip
Eating and Sleeping
On any trip, these are two important things to think about in terms of expense and comfort. On the train, each group of rooms had a Steward assigned. That person scheduled and ordered all meals. At the time requested, the Steward set the room for sleeping. We just had to show up for meals and when ready, climb into bed. Of course, there was also a shop in the lounge car to buy snacks and drinks.
The Lounge Car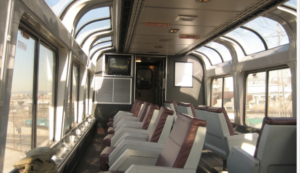
Our train had a lounge car. Some trains have observation areas on a second level. We could go to the lounge car, buy a snack and drink to sit and watch the scenery go by.
All the passengers had access to this car so there were times when the seating was taken. Fortunately, we had a large window in our roomette. We went to the lounge car to stretch our legs.
Station Stops
 Every couple of hours there was a brief station stop with time to get outside and walk a bit. Three times in our trip, we stopped long enough time to look at things local people had made for sale and to walk around the town close to the station. These stops were a good chance to get fresh air.
The Best Part
For us, the best part of the entire train trip was being together on this adventure without having to worry about driving or accommodations. In our room, we played cards, read, talked, slept and looked out the window. That might sound boring, but it is just what we needed. We had a great time with our grandkids. But, that’s another adventure.


 Exercise is just as important for us as seniors as it was when we were young. Resistance training helps retain muscle and core strength. Walking has lots of benefits. We want to share some walking for health tips that we have learned together over the years.
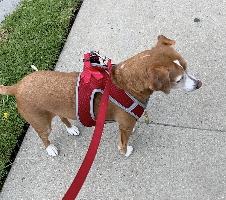 together. This can be up to a mile or more or less. The only problem is that Sage, our dog, stops every 100 ft. to smell something. We don’t really get our heart rate up, but the walk is still important.
 In the early evening, we often walk through our neighborhood for 45 minutes or an hour. We enjoy talking during this time so we don’t walk extremely fast. We do raise our heart rate. This is one of our walking for health tips. Walking together makes it more fun. Walking together at night helps us feel a bit safer. We live in a good neighborhood but….


 A New Project
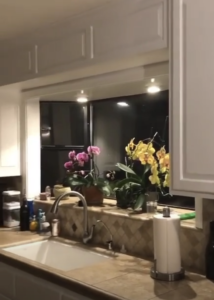

 There are several reasons to prime a concrete garage floor. Ultimately, we primed the floor so that the paint would bond better to the concrete.
 While we were painting we blocked the garage door so that our supervisor could watch us, but not get on the floor.
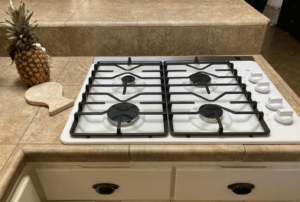

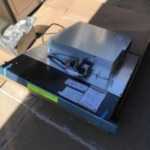
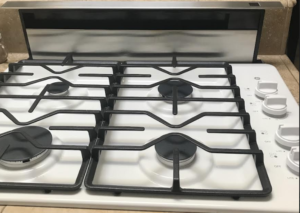
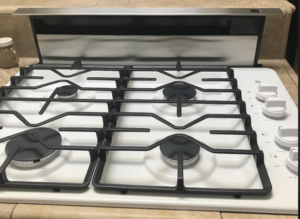
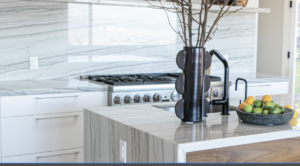
 The new cook top had a 1/2 inch gas fitting. The old fitting was 1/4 inch. So, I went off to the hardware store. It just took a couple of minutes to change the fitting on the gas line.
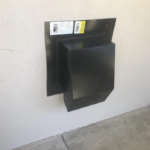
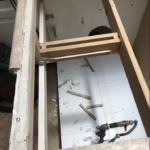
 fan to fit into the counter. With some angling and some technical language, the downdraft fit. As it turns out, this one is far more powerful than our old one.


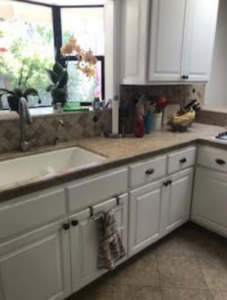

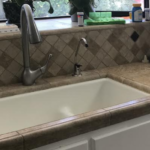 that we wanted a large, single bowl, stainless steel sink. As well, we wanted a new industrial faucet. In fact, our old porcelain sink and fixture had been around for 15 years. Consequently, we were sick of it and wanted something new and easier to clean. Beforehand, we had estimated that the cost for a new sink and fixture with installation would be about $500.
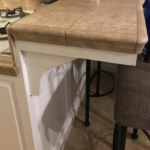
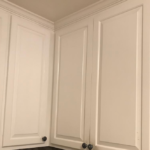
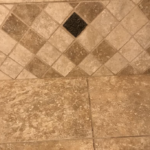 The tile on the counter and the backsplash was dated. Originally, it was put in to last for 10 years. It has been there a lot longer. As well, we have found that the grout between the tiles requires a great deal of maintenance.
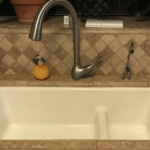


 backyard, but in camping chairs listing to a creek just a few yards away.